Automatic export


Automatic export |
|
|
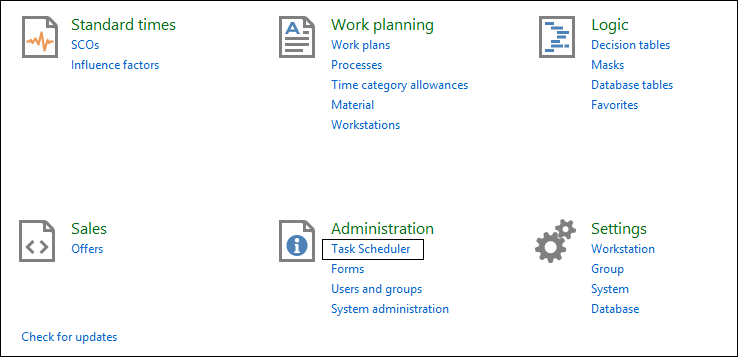
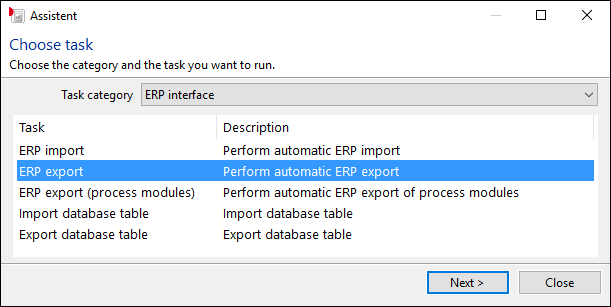
The automatic export is executed via the Task Planner within the %TITLE%> program. Open the Task Scheduler via the main program window. Task SchedulerUse the Task menu to create a new task. If the ERP interface has been activated via the PIN code, the Wizard will display the task ERP export for the new tasks. If this task does not appear here, either the PIN code has not been entered or has not been entered correctly. If so, repeat the registration procedure.
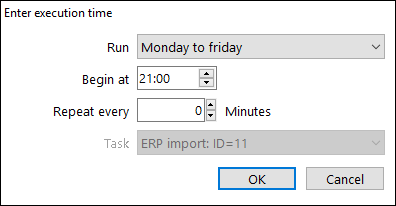
Select task ERP export and define the time and execution rule.
Select task ERP Export and define the time and execution rule.
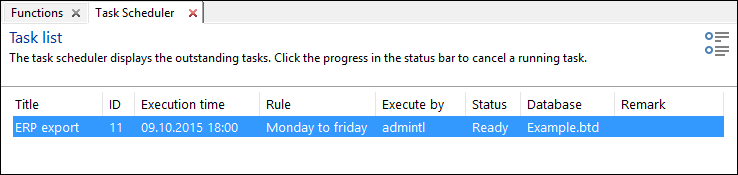
Confirming your entry with OK creates the task, which now appears in the Task Planner’s list of tasks.
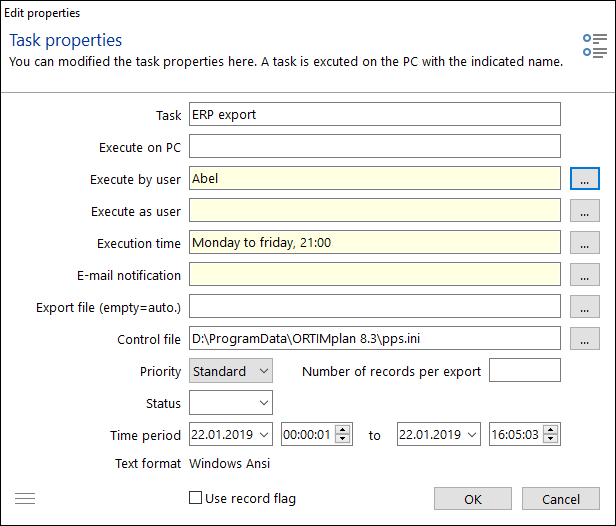
It is possible to open the properties by selecting the Task menu, followed by Edit.
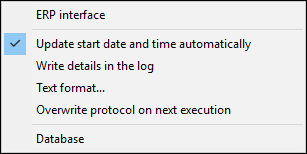
Export fileIf you enter a fixed file name (e.g. export.csv) this name is automatically expanded by a number, if the file already exists in the export directory (e.g. export_01.csv). Use an underscore as first character of the filename to disable the automatic numbering (e.g. _export.csv). Control fileThe control file determines the configuration (e.g. data fields, data format, text format, directories) that is to be imported. PrioritySetting the priority allows you to define separate time periods. The time of the last export for the set priority is saved and used as the new starting time during the next export. Number of records per exportThis option allows you to restrict the number of data records transferred during export. This setting is useful in order to save memory if you are planning to export a large number of data records. If this option is not selected, the restriction will be lifted. StatusList of status codes. A work plan or working process is exported, when its status is included in the status code list. Time periodThe four input boxes allow you to set the time period for the export directly. Normally speaking, the start time is the time of the last export performed; the end time is the current time. Text formatThe text format used for this task. The text format is defined centrally for all exports in the system settings for the ERP interface. If you want to create have to export data in a different text format, you can change the text format here differently for the individual export. Use record flagRuns the export with record flag. ... menu
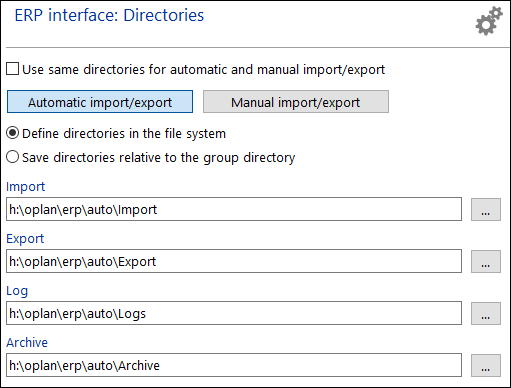
DirectoriesThe directories are defined via the system settings.
Prior to activating the automatic export, you first need to set a number of directories. The export directory is the destination directory for the export, where all the export files will be created. The priority function enables you to define a specific sequence for the export procedure when working with large volumes of export data. Log files are stored in the log directory. In addition, you can also find the export log in the log to the task ERP export. It is possible open the task log simply by double-clicking with the mouse on the task. The settings for the automatic export are stored within the data directory of ORTIMplan, namely in file PPS.INI. The directories may deviate from the directories used for the manual export.
|